 Save on Pinterest
 The scent of rosé mingling with sugar always takes me back to that spring afternoon when I first tested this cake, pans crowding every inch of my tiny apartment's countertop. I’d never attempted a gold drip before, so the excitement (and a little nervousness) felt electric as I unwrapped my edible gold dust. You could practically hear the fizz of the rosé as the batter came together, each swirl turning a more perfect shade of blush. If you've ever stood in your kitchen with music playing, frosting at your elbow and hope in your heart, you already know this cake's magic. It isn’t just elegant—it’s quietly, playfully joyful to bake.
I baked this for my cousin’s bridal shower, filling the house with the sounds of laughter, clinking glasses, and spatulas scraping bowls. She couldn’t stop smiling when she saw the blush-hued slices, and watching the gold glint in the afternoon light made all my practicing worth it.
Ingredients
- All-purpose flour: Sift it for a tender crumb and an even-rise texture.
- Granulated sugar: Sweetens with a clean taste—be sure to whisk out any lumps.
- Baking soda: Just a teaspoon lifts the batter without making it dry.
- Fine salt: A pinch sharpens and balances the sweetness.
- Cocoa powder (unsweetened): This tiny spoonful deepens the color and adds a whisper of richness.
- Vegetable oil: Keeps every forkful soft and moist, even after chilling.
- Large eggs: Room temperature eggs blend more easily and help the cake rise.
- Buttermilk: It’s essential for tang and tenderness—don’t substitute regular milk if you can help it.
- Rosé wine: Use a dry or sparkling kind for just the right hint of floral fruitiness (save a splash for yourself).
- Vanilla extract: Adds warmth and depth—go for real extract, not imitation.
- White vinegar: Reacts with baking soda for a perfect velvet texture.
- Pink or rose gel food coloring: The gel variety gives a vibrant shade with just a drop or two—start light and add more slowly.
- Unsalted butter: For the buttercream, make sure it’s truly at room temperature to whip up light and airy.
- Powdered sugar: Sifted—the key to a smooth, lump-free frosting.
- Edible gold luster dust: Make sure it’s food-safe; it creates a gorgeous, show-stopping finish.
- White chocolate chips and heavy cream: These combine for a glossy, manageable drip that sets gently on the cake.
- Vodka or clear lemon extract: Use just a touch to turn gold dust into paint without melting the drip beneath.
Tired of Takeout? 🥡
Get 10 meals you can make faster than delivery arrives. Seriously.
One email. No spam. Unsubscribe anytime.
Instructions
- Prep the pans:
- Line three 8-inch cake pans with parchment and grease the sides, enjoying that quick swoosh as you swipe on the oil—layers will come out like a dream.
- Mix the dry ingredients:
- Sift together flour, sugar, cocoa, baking soda, and salt until they feel like soft, fine sand between your fingers.
- Combine the wet ingredients:
- Whisk oil, eggs, buttermilk, rosé, vanilla, and vinegar—watch for the bubbles as you stir, a sign the magic is starting.
- Bring it all together:
- Fold the wet into dry until just combined, then swirl in food coloring until you find your perfect rose hue.
- Bake the layers:
- Pour the batter into pans and bake for 30–35 minutes; the kitchen will fill with a gentle, floral aroma as the cakes puff up.
- Cool completely:
- Let the cakes rest in the pans briefly, then transfer to a wire rack—they need to be fully cool before you even think about frosting.
- Make the buttercream:
- Beat the butter until fluffy and pale before gradually adding the powdered sugar; it will come together smooth if you take it slow.
- Add the rosé:
- Pour in the rosé, vanilla, and a pinch of salt—whip until the frosting is cloud-like, adjusting with more wine or sugar as you need.
- Assemble and crumb coat:
- Stack the layers, spreading buttercream in between, then cover the outside with a thin coat and chill to set.
- Final frosting and chill:
- Finish with a generous layer of buttercream, smoothing with long, even strokes; pop the cake back in the fridge as you make the drip.
- Create the gold drip:
- Gently melt white chocolate with cream and let it cool slightly—when it's just warm to the touch, pour it along the cake’s edges for graceful drips.
- Paint the gold:
- Once the drips have set, dab a clean brush in edible gold paint and transform every white line into a gleaming accent.
- Decorate:
- Scatter on a few rose petals or berries for that last festive flourish—and step back to admire your masterpiece.
 Save on Pinterest
  Save on Pinterest
 That day, as I placed the finished cake in the center of the table, I caught my aunt sneaking an early taste—she winked at me and whispered, This is almost too pretty to eat. Let me assure you, everyone found room for a second slice.
Getting the Perfect Pink Hue
I learned the hard way that gel food coloring is your best friend for this cake—a little goes a long way, and it won’t water down your batter. Mix it in slowly and pause to check under good light; the color deepens as it bakes, so start a shade lighter than you want for the finished cake.
Making Buttercream That’s Silky and Light
Room temperature butter is key here—the beaters should glide right through it. Don’t rush adding powdered sugar, and if your kitchen’s warm, a quick chill between steps will stop the buttercream from getting too loose or glossy.
Elegant Gold Drip Without the Fuss
Practice a drip or two on the parchment first to get a feel for how the chocolate flows—it shouldn’t be too runny or stiff, just slow and steady. Whisking the edible gold dust with vodka gives a quick-drying glimmer that won’t smudge when you brush it on.
- Have a clean, separate brush just for food use—gold dust gets everywhere.
- If your chocolate thickens, zap it in the microwave for five seconds and stir again.
- Let each step set before moving on; the results are worth a touch more time.
 Save on Pinterest
  Save on Pinterest
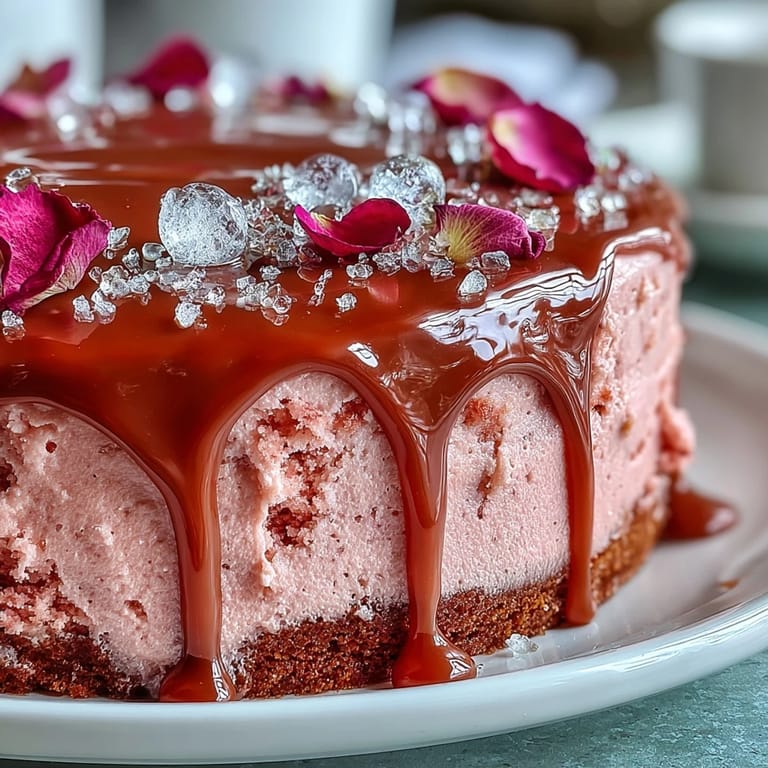
 This Rosé Velvet Cake brings a unique sparkle to the celebration—give yourself permission to enjoy the process, and every slice will carry a bit of that warmth. I hope your kitchen feels as festive as mine did the day I first made it.
Recipe FAQs
- → Can I use sparkling rosé or should it be still?
Either works. A dry or sparkling rosé adds a light floral note; reduce other liquids slightly if the batter seems too loose.
- → How do I keep the pink color vibrant?
Use gel or paste food coloring for concentrated color and add it at the wet stage. Avoid overmixing and bake just until set to prevent fading.
- → What yields the cleanest gold drip?
Pour a cooled but still-pourable white-chocolate drip onto a chilled cake so it sets quickly. Mix luster dust with a clear food-safe extract to paint the drips once set.
- → Any tips for a silky rosé buttercream?
Beat butter until very light, add powdered sugar gradually, and incorporate rosé a tablespoon at a time until you reach a stable, spreadable consistency.
- → Can this be made ahead and how should it be stored?
Yes. Assemble and chill up to 24 hours in the refrigerator. Bring to room temperature before serving for best texture; protect gold accents while chilling.
- → What allergen precautions should I take?
This cake contains wheat, eggs, and dairy; some white chocolates may include soy. Check ingredient labels and substitute as needed for specific allergies.