 Save on Pinterest
 There's something magical about that moment when cold espresso meets vanilla sweetness—when you bite through a dark cookie and hit pure, creamy vanilla. I discovered this combination quite by accident, actually, when a friend ordered a vanilla frappuccino at a café and I tasted a sip while holding a chocolate espresso cookie from the display case. The flavors clicked in my mouth before my brain caught up, and I spent the next week obsessing over how to bottle that exact sensation into something I could make at home.
I made these for my roommate's birthday last summer, and watching her face when she bit into one—that mix of surprise and delight—made all the churning and chilling completely worth it. She'd been stress-eating plain cookies all week, so presenting her with something that tasted like a dessert shop creation felt like giving her permission to slow down and enjoy something extraordinary.
Ingredients
- Unsalted butter (1 cup, softened): This is your base for flavor and texture; softened butter creams better and distributes evenly, giving you those tender, melt-in-your-mouth cookies.
- Brown sugar (1 cup packed) and granulated sugar (1/2 cup): The brown sugar brings depth and moisture while granulated sugar helps with structure; together they create complexity that plain white sugar never could.
- Large eggs (2): Room temperature eggs incorporate better and create a more cohesive dough that holds the espresso and cocoa flavors.
- Vanilla extract (2 tsp): This bridges the gap between the bitter espresso and the sweet ice cream, acting as a flavor translator.
- All-purpose flour (2 1/2 cups): The foundation of your cookies; measure by spooning and leveling to avoid packing too much into your cup.
- Unsweetened cocoa powder (1/2 cup): Don't skip sifting this—lumps of dry cocoa will ruin your texture, and the sifting only takes thirty seconds.
- Instant espresso powder (2 tbsp): This is non-negotiable for that authentic coffee shop depth; regular instant coffee is too weak and will disappoint you.
- Baking soda (1 tsp) and salt (1/2 tsp): Baking soda reacts with the acidity in cocoa and espresso to help cookies spread slightly and develop those crispy edges.
- Heavy cream (2 cups) and whole milk (1 cup): The cream-to-milk ratio creates that silky texture without being overwhelmingly heavy; all cream makes it icy, all milk makes it thin.
- Granulated sugar (3/4 cup) and vanilla bean (1 whole): Split that bean and scrape those tiny seeds—they're flavor bombs that vanilla extract simply can't match, though paste works in a pinch.
Tired of Takeout? 🥡
Get 10 meals you can make faster than delivery arrives. Seriously.
One email. No spam. Unsubscribe anytime.
Instructions
- Chill your vanilla bean base:
- Combine milk, sugar, those precious vanilla bean seeds and the pod itself, plus a pinch of salt in a saucepan over medium heat. Watch it steam gently without boiling—you'll smell the vanilla beginning to wake up. Remove from heat, discard the pod, stir in the heavy cream, and let it sit in the fridge for at least two hours until it's completely cold; rushing this step means grainy ice cream, so be patient.
- Churn the ice cream:
- Pour your chilled mixture into the ice cream maker and follow your machine's instructions, which usually takes fifteen to twenty minutes. The moment it comes out, you'll notice it's soft-serve consistency—this is perfect. Spread it into your parchment-lined pan to about an inch thick and freeze for at least two hours until it's firm enough to cut.
- Cream your butter and sugars:
- In a large bowl with an electric mixer, beat softened butter with brown sugar and granulated sugar until the mixture is pale, fluffy, and noticeably lighter than when you started—this takes about three minutes. This aeration is essential; it's where your cookies get their tender crumb.
- Incorporate eggs and vanilla:
- Add eggs one at a time, beating well after each addition so they fully incorporate and don't separate. Once both eggs are in, add vanilla extract and mix until smooth.
- Combine dry ingredients carefully:
- In a separate bowl, whisk together flour, cocoa powder, espresso powder, baking soda, and salt, making sure everything is evenly distributed with no cocoa lumps hiding. Sift if you're feeling thorough, though a good whisking usually does the job.
- Mix wet and dry together:
- Add your dry mixture to the wet mixture in stages, stirring just until combined—overmixing develops gluten and makes cookies tough instead of tender. Stop as soon as you don't see streaks of flour anymore.
- Roll and cut your cookies:
- Divide dough in half and place each half between two sheets of parchment paper. Roll to about a quarter inch thickness, which gives you cookies that are crispy around the edges but still slightly soft in the center. Cut out sixteen rounds using your three-inch cutter, working quickly so the dough doesn't warm up.
- Bake until set:
- Place cookies on parchment-lined baking sheets and bake at 350°F for ten to twelve minutes until the edges look set but the centers still seem slightly underbaked—they'll continue cooking on the hot pan as they cool. Cool completely on a wire rack before assembly.
- Cut ice cream and assemble:
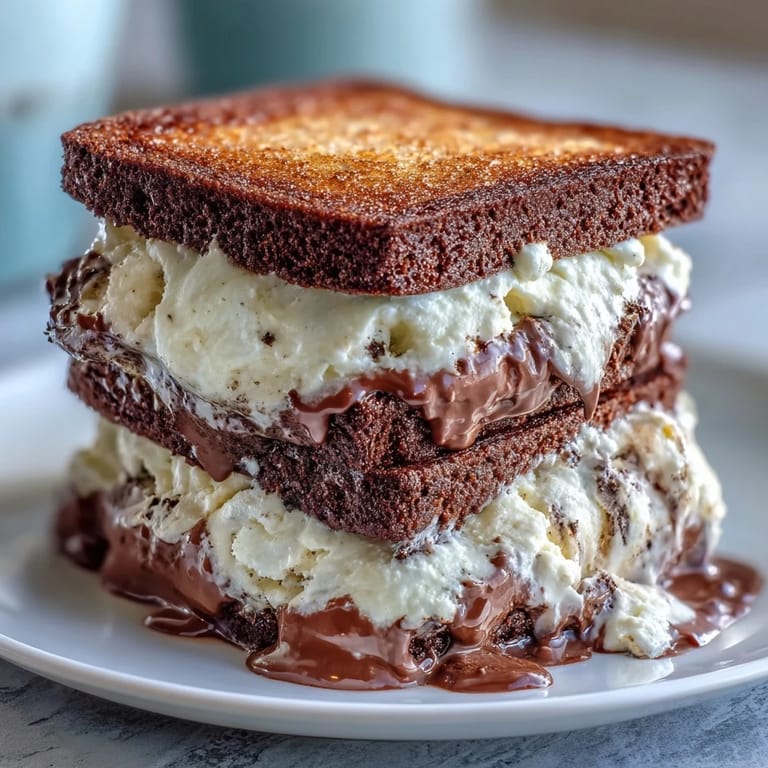
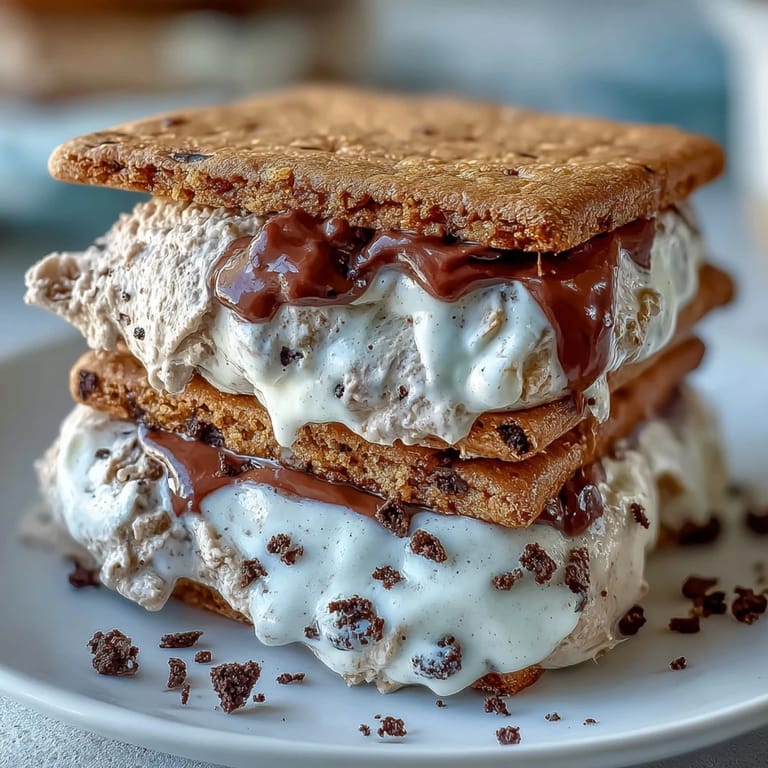
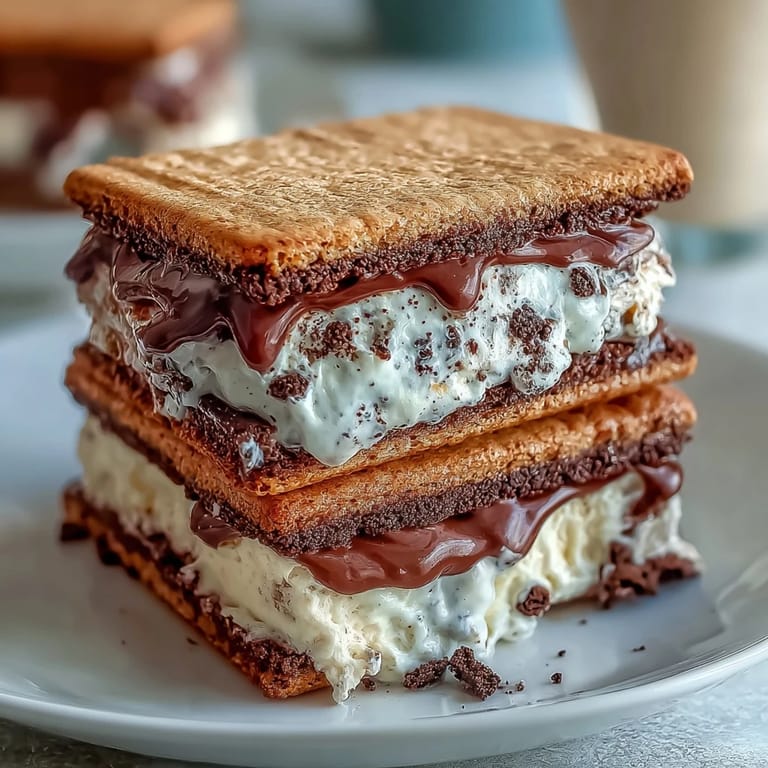
- Remove your frozen ice cream slab from the freezer and use the same three-inch cutter to cut eight rounds, working quickly so your hands don't warm it too much. Sandwich each ice cream round between two cookies, press gently together, wrap in parchment, and freeze for at least an hour before serving.
 Save on Pinterest
 What surprised me most was how these sandwiches transformed ordinary moments into something special—my partner started sneaking them from the freezer at midnight, and suddenly we had this secret ritual of standing in the kitchen in our pajamas, sharing these treats and actually talking to each other without the noise of a day between us. Sometimes the best part of food isn't the flavor; it's what it creates space for.
The Ice Cream Maker Question
I get asked constantly whether you really need an ice cream maker for this, and the honest answer is no, but it changes the texture. If you're working without one, pour your chilled ice cream base into a shallow dish and pop it in the freezer, stirring vigorously with a fork every thirty minutes for about two hours until you get a thick, creamy consistency. It won't be quite as smooth and silky as the machine version, but it'll still taste delicious and freeze solid enough to cut into rounds. The texture ends up a bit more granular, which some people actually prefer because it feels more intentional and homemade.
Storage and Make-Ahead Magic
These sandwiches are brilliant for entertaining because you can make them days in advance—wrapped individually in parchment and tucked in a freezer-safe container, they keep perfectly for up to two weeks. I've pulled them out for impromptu desserts, late-night cravings, and even a picnic once where they slowly melted into something between ice cream and a cold beverage that nobody complained about. The cookies also freeze beautifully on their own if you want to make them separately from the ice cream, which means you can bake on a cool day and assemble whenever inspiration strikes.
Variations and Creativity
Once you nail this basic version, the possibilities expand in delicious directions. I've experimented with adding a tablespoon of instant coffee powder directly into the ice cream base for a more pronounced coffee flavor, and I once rolled the sandwich edges in crushed espresso beans for texture that made the whole thing feel intentional and artisanal. You could swap the vanilla bean for salted vanilla, dust the cookies with sea salt before baking, or even add a layer of dulce de leche between the cookie and ice cream for something truly decadent.
- For extra visual drama and taste, roll the sandwich edges in mini chocolate chips or finely crushed espresso beans right before the final freeze.
- If you're short on time, substitute store-bought vanilla bean ice cream and just make the espresso cookies from scratch—nobody will judge you and the result is still impressive.
- Always let the finished sandwiches sit at room temperature for two to three minutes before eating so the cookies soften slightly and the whole thing becomes less slippery to hold.
 Save on Pinterest
 These sandwiches represent something I've learned about cooking for people: sometimes the most memorable treats aren't the ones that look complicated, but the ones that taste like someone understood exactly what would make you happy. Every bite reminds me why I keep coming back to the kitchen.
Recipe FAQs
- → How do I roll out dough evenly for the cookies?
Roll the dough between two sheets of parchment paper to about 1/4 inch thickness to ensure even baking.
- → Can I make the ice cream without a machine?
Yes, freeze the mixture in a shallow dish and stir every 30 minutes until creamy and firm.
- → What espresso powder alternatives work well?
Instant coffee granules can be used but may alter the intensity; adjust quantity to taste.
- → How to keep sandwiches from sticking during freezing?
Wrap each sandwich in parchment paper before freezing to prevent sticking and preserve shape.
- → Can I add extra texture to the edges?
Roll the edges in mini chocolate chips or crushed espresso beans before freezing for added crunch.