 Save on Pinterest
 My kitchen smelled like a county fair the first time I attempted popcorn chicken at home—that unmistakable aroma of buttermilk and hot oil mingling together. I'd been craving that fast-food version for weeks, but something about making it myself felt like a small rebellion against drive-through windows. What started as a casual Sunday afternoon turned into the kind of cooking project where you keep sneaking golden pieces straight from the cooling rack, burning the roof of your mouth without regret. The moment I realized I could crack that crispy exterior and find juicy, tender chicken inside—chicken I'd chosen and seasoned myself—I knew this would become a regular thing.
I made these for my sister's book club night, thinking they'd be a casual appetizer nobody would think twice about. Instead, people kept drifting back to the platter all evening, and by the end, I was getting requests for the recipe before anyone had even finished their wine. That's when I knew this recipe had something special—it turned a simple snack into the unexpected star of the night.
Ingredients
- Boneless, skinless chicken breast or thigh (500 g): Thighs stay juicier when fried, but breasts are leaner if that matters to you—either way, cut them small enough that they cook through before the outside burns.
- Buttermilk (120 ml): This is your secret weapon; the acidity tenderizes the chicken while the fat keeps it moist, so don't skip it or substitute regular milk.
- All-purpose flour (150 g): The flour forms your base layer, so make sure it's fresh and stored in a cool, dry place.
- Cornstarch (50 g): This is what gives you that extra crunch—the starch crisps up in hot oil in a way regular flour can't quite match.
- Baking powder (1 tsp): The leavening creates tiny air pockets in the crust, making it even lighter and crispier.
- Paprika, garlic powder, onion powder, salt, and black pepper: These humble seasonings layer flavor directly into both the marinade and the breading, so taste as you go and adjust to your preference.
- Cayenne pepper (optional, ½ tsp): Add this only if you like heat; even a small amount registers, so start conservative.
- Vegetable oil: You need enough to submerge the chicken completely, and maintain it at a steady 180°C (350°F)—use a thermometer, not guesses.
Tired of Takeout? 🥡
Get 10 meals you can make faster than delivery arrives. Seriously.
One email. No spam. Unsubscribe anytime.
Instructions
- Marinate the chicken:
- Combine your cut chicken pieces with buttermilk and all the marinade seasonings in a bowl, making sure every piece is coated. Cover and let it sit in the refrigerator for at least 30 minutes—this is worth the wait because the buttermilk softens and flavors the meat from the inside out.
- Mix the coating:
- In a separate large bowl, whisk together the flour, cornstarch, baking powder, paprika, salt, cayenne, and black pepper until everything is evenly distributed. This is your crust formula, so take a moment to really mix it well.
- Heat your oil:
- Pour oil into your deep fryer or heavy-bottomed pot and bring it to exactly 180°C (350°F)—too cold and the coating absorbs oil instead of crisping; too hot and the outside burns before the inside cooks. Use a thermometer if you have one.
- Coat the chicken:
- Pull chicken pieces from the marinade, letting excess buttermilk drip back into the bowl, then toss them in the flour mixture until completely coated. For that extra-crispy restaurant texture, dip each floured piece back into the buttermilk briefly, then re-coat in the flour mixture.
- Fry in batches:
- Working in small batches so you don't crowd the pot and drop the temperature, carefully lower the coated chicken into the hot oil. Fry for 3–4 minutes, turning occasionally, until the outside is deep golden brown and the chicken is cooked through—you'll hear the sizzle change slightly when it's done.
- Drain and rest:
- Use a slotted spoon to lift the chicken onto a wire rack or paper towels, where it will continue to crisp as it cools. This moment of patience pays off in texture.
 Save on Pinterest
 One afternoon, my niece watched me make these and asked if she could pick one piece straight from the rack. I said yes, expecting her to burn her mouth, but instead she closed her eyes like she'd just tasted pure joy. That single moment—watching someone experience food you made exactly the way you intended—made me understand why people spend hours in kitchens.
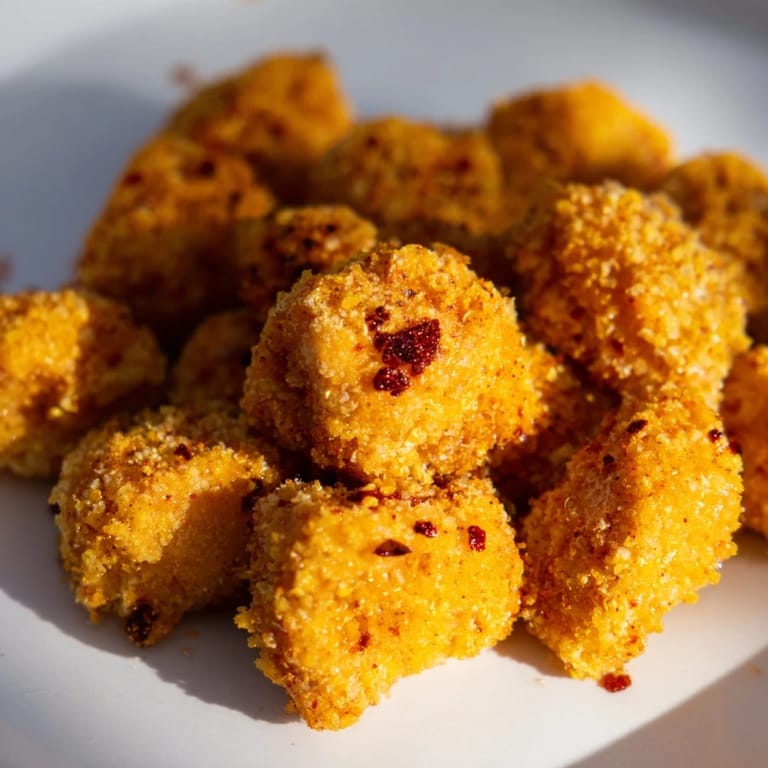
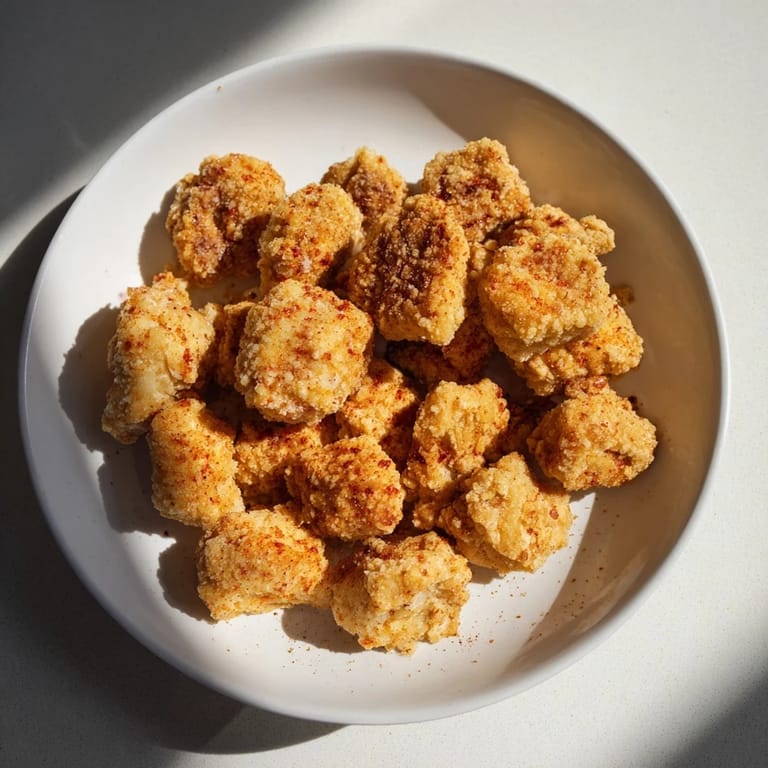
The Double-Coat Difference
Most recipes will tell you to coat chicken once and be done, but that second dip into buttermilk followed by a second coat in flour is what creates the shattered, almost jewel-like exterior that catches the light when it's done. The moisture from the second buttermilk layer reactivates the flour starches, creating an even more intricate crust. I learned this by accident when I knocked one piece back into the buttermilk and figured I might as well coat it again, and the difference was impossible to ignore.
Oil Temperature and Your Success
I spent years frying things without a thermometer, guessing based on how fast bubbles rose, and the results were wildly inconsistent. Once I invested in a simple digital thermometer, everything changed—180°C (350°F) is the exact sweet spot where the coating crisps before the outside overcooks and the inside stays tender. If you don't have a thermometer, a wooden skewer or chopstick will give you feedback; if it immediately surrounds itself with vigorous bubbles, you're ready.
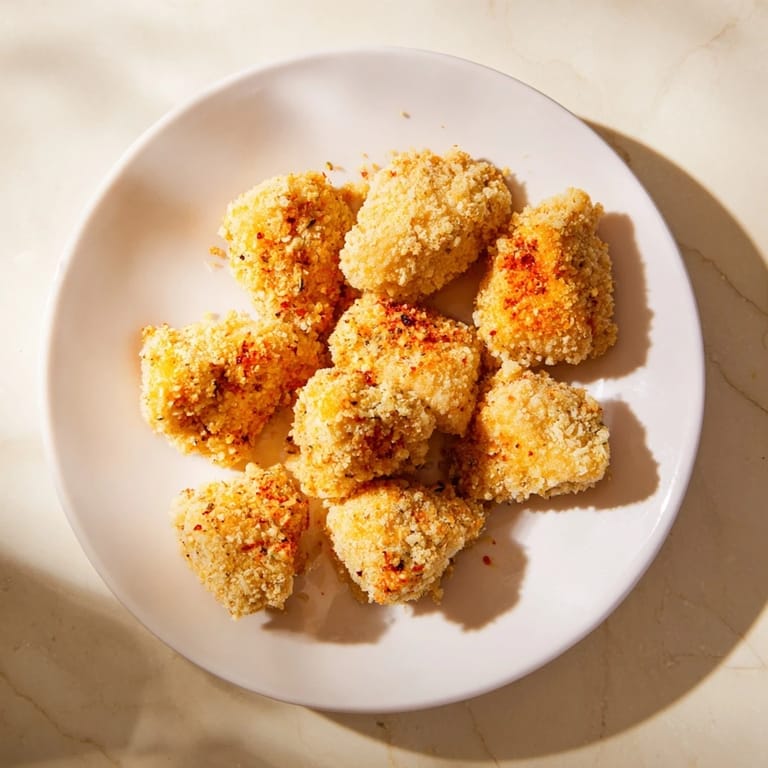
Serving and Keeping These Perfect
Serve these hot, ideally within minutes of draining, when the crust is at its crackling best. They stay decent in a warm oven for about 20 minutes, but reheating in the air fryer for a few minutes will revive them better than anything else if you need to make them ahead. Dipping sauces are essential—I keep ranch, honey mustard, and a spicy mayo on rotation.
- If you're making these for a crowd, set up a station where people can coat and fry their own batches—it becomes interactive and fun.
- Leftover chicken keeps in the refrigerator for three days and can be eaten cold or reheated gently, though the crust won't be as perfect.
- Thighs take slightly longer to cook through than breasts, so if you mix them, watch the thighs more carefully.
 Save on Pinterest
 These popcorn chicken pieces have become my go-to when I need something that feels special without actually being complicated. There's something deeply satisfying about taking a handful of simple ingredients and transforming them into food that makes people smile.
Recipe FAQs
- → How do I achieve extra-crispy chicken bites?
Double coating the marinated chicken by dipping it back into buttermilk before reapplying the flour mixture adds extra crunch and texture.
- → What cut of chicken works best for this preparation?
Boneless, skinless chicken breast or thigh cut into bite-sized pieces works well, with thighs offering added juiciness.
- → Can I adjust the heat level in the coating?
Yes, increasing cayenne pepper or adding chili powder to the breading can provide a spicier finish to the chicken bites.
- → What oil is recommended for frying?
Vegetable oil with a high smoke point is ideal for deep frying to ensure even cooking and a crisp texture.
- → How should I serve these crispy chicken bites?
Serve hot with dipping sauces like ranch, honey mustard, or barbecue for a flavorful pairing.