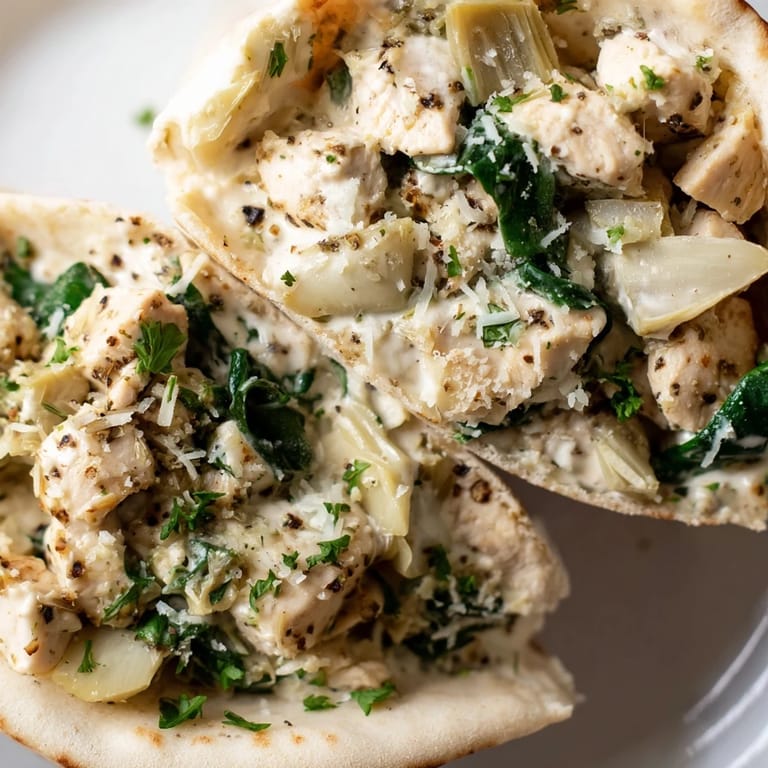
 Save on Pinterest
 The first time I stuffed a pita bread, I overfilled it so completely that the filling burst out the side while baking, creating a delicious but chaotic mess on my baking sheet. My husband laughed and said we should call it deconstructed stuffed pita, but I learned to leave just enough room for the cheese to bubble without escaping. Now I get this perfect balance where the creamy filling melts into the bread itself, creating those golden edges that everyone fights over.
Last winter, when my sister was recovering from surgery and needed meals that felt comforting but still nourishing, I brought over a batch of these stuffed pitas. She texted me the next day saying they were the first thing in weeks that actually made her excited to eat, and now she requests them every time I visit. Theres something about warm, handheld food that feels like a hug.
Ingredients
- 2 cups cooked chicken breast: Rotisserie chicken works beautifully here and saves time, or use leftover grilled breast for a smokier depth
- 1 cup canned artichoke hearts: These add a tangy, slightly briny bite that cuts through the creaminess
- 1 cup fresh spinach: Finely chop it so it wilts into the filling rather than creating watery pockets
- 1/2 cup Greek yogurt: This creates the silkiest base while keeping things lighter than sour cream
- 1/4 cup light mayonnaise: Just enough to bind everything together without overwhelming the other flavors
- 1/2 cup shredded mozzarella cheese: The melt factor that creates those irresistible cheese pulls
- 1/4 cup grated Parmesan cheese: Adds a salty, nutty richness that deepens the overall flavor
- 1 clove garlic, minced: Fresh garlic is essential here, powder simply cannot replicate that aromatic punch
- 1/2 teaspoon onion powder: Rounds out the savory notes without adding extra prep time
- 1/2 teaspoon dried oregano: Mediterranean classic that ties everything together
- 1/4 teaspoon crushed red pepper flakes: Optional, but a tiny pinch creates a beautiful warmth that lingers
- Salt and black pepper: Taste as you go, since the cheese and artichokes already bring saltiness
- 4 large pita breads: Whole wheat adds nuttiness and fiber, but regular white creates that classic pillowy softness
- Fresh parsley and lemon wedges: These bright, fresh elements cut through the richness and wake up your palate
Tired of Takeout? 🥡
Get 10 meals you can make faster than delivery arrives. Seriously.
One email. No spam. Unsubscribe anytime.
Instructions
- Get your oven ready:
- Preheat to 375°F and line a baking sheet with parchment paper so nothing sticks and cleanup is effortless
- Mix the creamy filling:
- In a large bowl, combine the chicken, artichokes, spinach, Greek yogurt, mayonnaise, mozzarella, Parmesan, garlic, onion powder, oregano, red pepper flakes, salt, and pepper until everything is well distributed
- Prep the pita pockets:
- Carefully slice each pita bread in half to create pockets, being gentle not to tear through the back
- Stuff generously but not greedily:
- Fill each pita half with the spinach artichoke mixture, leaving just enough room for the cheese to expand without bursting
- Arrange and bake:
- Place the stuffed pitas on your prepared baking sheet and bake for 15 to 20 minutes until the filling is hot and bubbling
- Finish with freshness:
- Sprinkle with chopped parsley and serve alongside lemon wedges for squeezing over the top
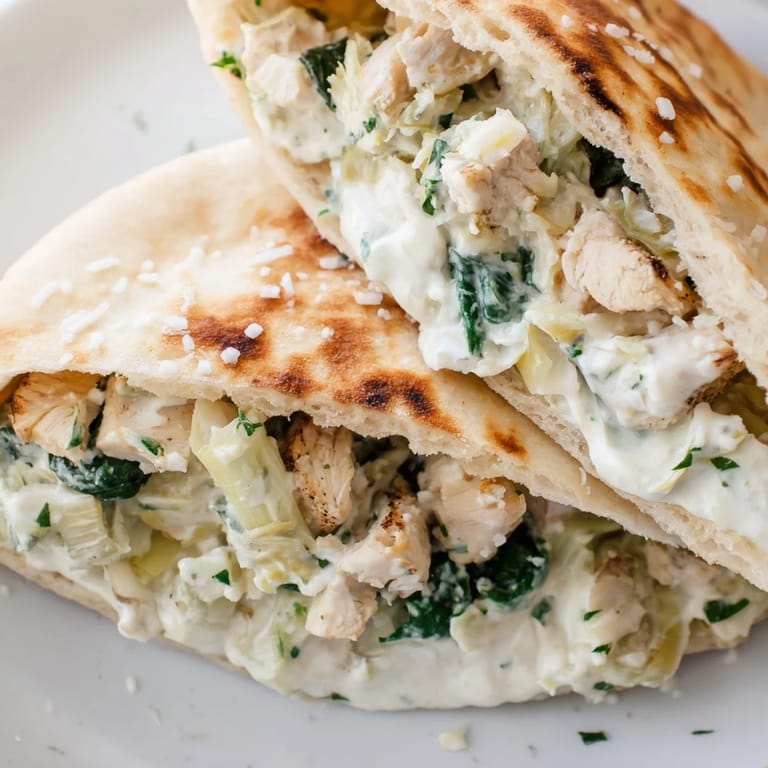 Save on Pinterest
 My daughter now requests these for her school lunch, but she insists I cut them in half so she can see the beautiful cross section of greens and creamy cheese. Watching her take that first bite, closing her eyes at the warm, comforting combination, reminds me why I started cooking in the first place.
Make Ahead Magic
The filling can be prepared up to two days in advance and stored in an airtight container in the refrigerator. In fact, the flavors meld and improve overnight, so I often double the filling recipe to stuff pitas throughout the week or use it as a dip with crackers.
Bread Wisdom
If your pita bread feels stale or dry, brush the outsides lightly with olive oil before baking and wrap them in foil for the first 10 minutes. This steams them back to life while the filling heats through, then remove the foil for the final minutes to achieve that perfect golden exterior.
Serving Ideas
A crisp green salad with a bright vinaigrette balances the richness of these stuffed pitas beautifully. For heartier appetites, a cup of tomato soup makes this feel like a complete comfort meal.
- Try warming your lemon wedges in the oven for the last 2 minutes of baking to release more juice
- A dollop of extra Greek yogurt on top adds an irresistible cool contrast to the warm filling
- Crumble a little feta over the finished pitas for a salty, tangy finish that elevates the dish
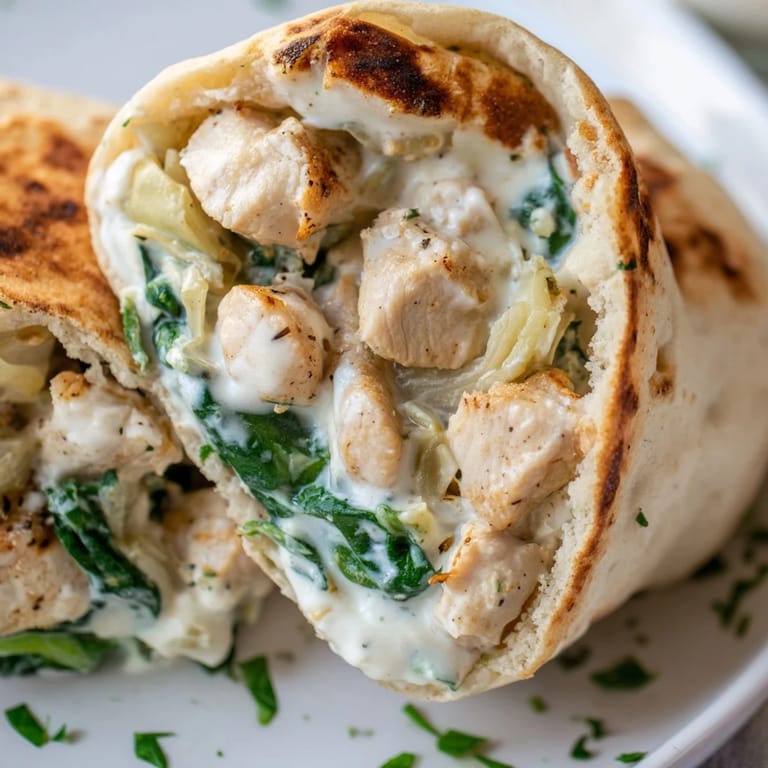 Save on Pinterest
 These stuffed pitas have become our go to for busy weeknights when we want something that feels special but does not require hours in the kitchen. I hope they bring as much warmth to your table as they have to ours.
Recipe FAQs
- → Can I use rotisserie chicken for this dish?
Yes, rotisserie chicken works wonderfully and adds extra flavor to the filling. Simply shred or dice the cooked meat and combine it with the other ingredients.
- → How do I prevent the pita pockets from tearing?
Gently warm the pita breads for 10-15 seconds in the microwave before slicing. This makes them more pliable and easier to open without tearing.
- → Can I make the filling ahead of time?
Absolutely. Prepare the filling mixture up to 24 hours in advance and store it in an airtight container in the refrigerator. Stuff and bake when ready to serve.
- → What can I substitute for Greek yogurt?
You can use cream cheese for a richer filling, or sour cream for a tangier flavor. Both alternatives work well with the other ingredients.
- → How do I store leftovers?
Store cooled stuffed pitas in an airtight container in the refrigerator for up to 3 days. Reheat in a 350°F oven for 10-12 minutes until warmed through.
- → Can I freeze these stuffed pitas?
Yes, assemble and wrap individually in foil, then freeze for up to 2 months. Thaw overnight in the refrigerator before baking as directed.